upgrade$115Upgrade item
DNA Analysis Upgrade
This upgrade improves the speed of the DNA Analysis station used during patient checks.
Effect: Increases DNA Analysis speed by 50% and reduces the completion time by 4.5 seconds.
Full list of all 31 Animal Hospital items, including upgrades, tools, treatment supplies, effects, and prices.
Upgrade Items improve hospital equipment, patient recovery, and the speed of your check-in workflow.
This upgrade improves the speed of the DNA Analysis station used during patient checks.
Effect: Increases DNA Analysis speed by 50% and reduces the completion time by 4.5 seconds.
This upgrade makes the hospital Printer process its work faster.
Effect: Increases Printer speed by 25%.
This upgrade shortens the time patients need to recover after treatment.
Effect: Increases the recovery speed of patients by 25%.
This upgrade removes the initial pause in the patient check-in process.
Effect: Speeds up patient check-in by removing the initial ellipsis dialogue.
This upgrade expands the lobby check-in station with an additional window.
Effect: Adds another check-in window so two patients can be processed at the same time.
Tools help you manage emergencies, defend the hospital, restore sanity, and verify dangerous patients.
Coffee is renewable through the machine in the Reception Office and can also appear in the Supplies Shop. It has three sips, and offering it to a Head Banger is the correct response without risking sanity.
Effect: Restores 5% sanity per sip, up to 15% total. Can also safely extinguish Death Ritual candles and calm Head Bangers.
Chocolate Bar provides much stronger sanity recovery than Coffee, but it is not renewable through the hospital. Each bar has three bites before it is consumed.
Effect: Restores 20% sanity per bite, up to 60% total.
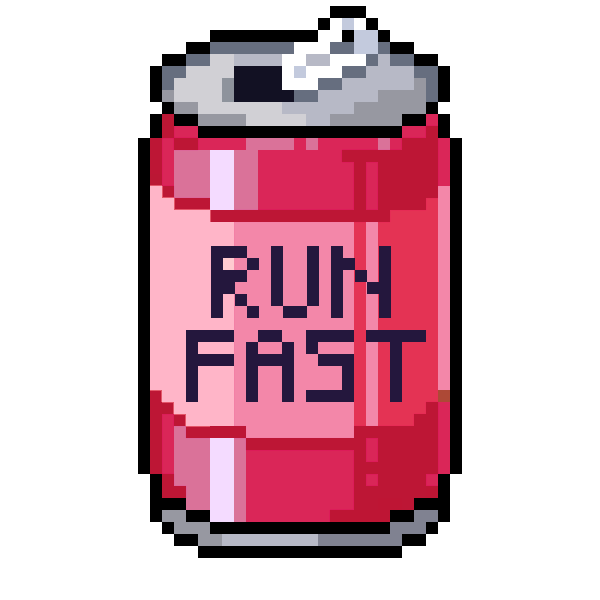
Run Fast Cola becomes available from Shift 3. It can be bought at the Supplies Shop or vending machine, and the item can be stacked. Paramedic receives one automatically.
Effect: Increases movement speed for up to 30 seconds without changing interaction speed.
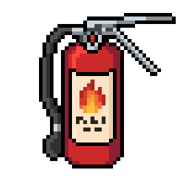
The regular Fire Extinguisher is found beside the Supplies Shop from Shift 3. It is the fastest way to clear fires and can also defeat Hiders or temporarily reveal the Ghost.
Effect: Puts out room fires, burning patients, and Slime quickly.
The Firefighter class starts with this version. Unlike the regular extinguisher, it recharges in the player's hand instead of needing a return to the recharge station.
Effect: Works like the Fire Extinguisher and regenerates its charge while held.
The Teddy Bear becomes available when the Supplies Shop opens. Save it for a teammate recovery because it cannot be used on the player carrying it.
Effect: Revives one dead teammate, but cannot revive the Teddy Bear's owner.
The most important weapon in the game. This is the ONLY tool that can kill a Skinwalker — no other item or action works. Comes with 20 rounds. Do NOT waste shots on other enemies — most are immune or multiply when shot.
Effect: Lethal weapon for attacking anomalies and the only reliable way to eliminate a Skinwalker.
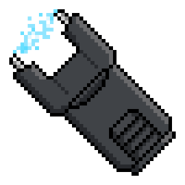
The Taser unlocks free in the Shift 4 progression and can later be bought from the Supplies Shop. It creates distance from enemies but does not eliminate Skinwalkers. Security can receive a regenerating X-Taser at level 3.
Effect: Non-lethal stun that instantly incapacitates most enemies for a short time.
Mint Tea is sold in the Supplies Shop and slowly restores sanity after use. It can also be given to Dr. Harlow for a Journal achievement.
Effect: Restores sanity gradually over time.
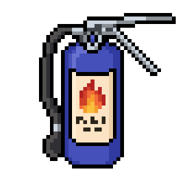
Large Run Cola is the Paramedic's stronger cola variant. It looks like a blue Run Fast Cola, lasts 120 seconds, and cannot be stacked, while normal Run Fast Cola can be stacked.
Effect: Provides six uses of the Run Fast Cola speed boost, lasting up to 120 seconds; Paramedic level 2 increases it to nine uses.
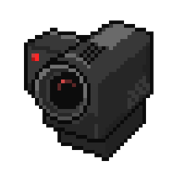
Use it to cover a check-in lane, hallway, or blind corner outside the fixed CCTV network. The Scanner cannot be fired through its camera feed, so treat it as information rather than a remote diagnosis tool.
Effect: Adds a movable camera feed that can be placed, viewed, picked up, and repositioned.
The Secret Agent version is reusable after a cooldown, while the shop version is consumed after one scan. Aim at one patient at a time: overlapping targets and camera-feed scans are not reliable.
Effect: Checks one target and returns a green or red reading.
Treatment Items are free supplies used to relieve specific symptoms or complete Surgery mini-games.
Use the Scalpel when the active surgery prompt calls for it.
Effect: Used on patients during the Surgery mini-game.
Use the Scissors when the active surgery prompt calls for it.
Effect: Used on patients during the Surgery mini-game.
Use the Organ during the matching step of the Surgery mini-game.
Effect: Used on patients during the Surgery mini-game.
Use the Transplant during the matching step of the Surgery mini-game.
Effect: Used on patients during the Surgery mini-game.
Use Herbs on a patient whose symptom is a headache.
Effect: Cures headaches.
Use Medicine on a patient whose symptom is a stomach ache.
Effect: Cures stomach aches.
Use the Thermometer on a patient with a fever.
Effect: Cures fever.
Use the Medkit on a patient with bruises.
Effect: Cures bruises.
Use Ointment on a patient with burns or a rash.
Effect: Cures burns and rashes.
Use a Bandage on a patient who is bleeding.
Effect: Cures bleeding.
Use Cough Syrup on a patient with the flu.
Effect: Cures the flu.
Use Maple Syrup for the low Sugar or Canadian patient prompt.
Effect: Cures low Sugar and being Canadian.
Use Eye Drops on a patient with dry eyes.
Effect: Cures dry eyes.
Use IV Drops on a patient with dehydration.
Effect: Cures dehydration.
Sanity is your mental health meter. It drains continuously under pressure and drops sharply from traumatic events. Low sanity impairs your vision, judgment, and reaction time — making it harder to spot anomalies when you need to most.
What drains sanity:
What restores sanity:
| Purchase route | What to buy around it | Best stage | Why it works |
|---|---|---|---|
| Beginner route | Coffee, then Gun | Early and first dangerous unlocks | Protect sanity and prepare for Skinwalkers |
| Solo route | Coffee plus reliable automation | Mid solo progression | You need fewer rushed actions, not flashy purchases |
| Late-shift route | Recovery plus core defense tools | Long or endless runs | Pressure lasts longer and mistakes compound faster |
| Problem | Best tools | What the purchase solves | Decision rule |
|---|---|---|---|
| Sanity pressure | Coffee, Chocolate Bar, Mint Tea | Use Coffee for repeatable light recovery and the specific Head Banger response | Keep one recovery item before buying convenience tools |
| Confirmed Skinwalker | Gun | The focused lethal counter with 20 rounds | Do not spend rounds on unrelated enemies |
| Roaming threat | Taser | Create distance without using lethal ammunition | Unlock from Shift 4, then buy it when the team needs defense |
| Fire or Slime | Fire Extinguisher | Clear the room and create an escape window | Carry it before the event starts |
| Team recovery | Teddy Bear | Revive one teammate, not its carrier | Buy only when team recovery is worth the inventory slot |
| Remote coverage | Deployable Camera | Watch a blind route outside fixed CCTV | Place it where no player can watch continuously |
The shop is strongest when it removes your most expensive mistakes. Buy recovery before comfort, buy the Gun before optional tools, and treat automation as a way to free attention for anomaly checks rather than a luxury purchase.
Coffee is the highest-priority item — it restores sanity and neutralizes Head Bangers at the admission window. After Coffee, save for the Gun, then choose recovery or defense tools that match the next shift. Chocolate Bar is a good backup sanity item if Coffee is not in stock.
Sanity drains from witnessing disturbing events, making wrong treatment decisions, prolonged exposure to anomalies and enemies, and failing events. When sanity drops below half, your vision distorts and your judgment becomes impaired — making further mistakes more likely. Coffee and Chocolate Bar restore sanity. The Psychologist class provides passive sanity resistance.
The Supplies Shop unlocks after your first few shifts (typically after Shift 2). It refreshes its inventory between shifts and you can reroll the available items for a fee. Not all items are available every shift — if a high-priority item like the Gun appears, buy it immediately rather than waiting.
The Gun is the higher priority because Skinwalkers (Shift 3+) must be shot to eliminate — a Taser will not kill them. The Taser is situationally useful for stunning roaming enemies to create distance, but it does not kill. Buy the Gun first, then consider the Taser as a secondary tool for higher shifts.
The Teddy Bear costs $1010 and revives one dead teammate. It cannot revive the player carrying it, so it is a team-recovery purchase rather than a sanity item.
Prices scale roughly by priority: Coffee is cheapest, Chocolate Bar and Run Fast Cola are mid-range, and the Gun and Taser are more expensive. Save aggressively for the tool that solves your current shift pressure.
Secret Agent starts with a reusable Scanner that returns after a cooldown. The shop Scanner is consumed after one use. Both should be aimed at one target at a time and neither replaces the normal visual, photo, CCTV, and document checks.
Mint Tea restores sanity gradually over time. It is useful for long-shift recovery, but Coffee remains necessary when you need the specific Head Banger response.
Use it on room fires, burning patients, and Slime. It can also handle Hiders and briefly reveal the Ghost, so keep it accessible before emergency shifts.